Introduction
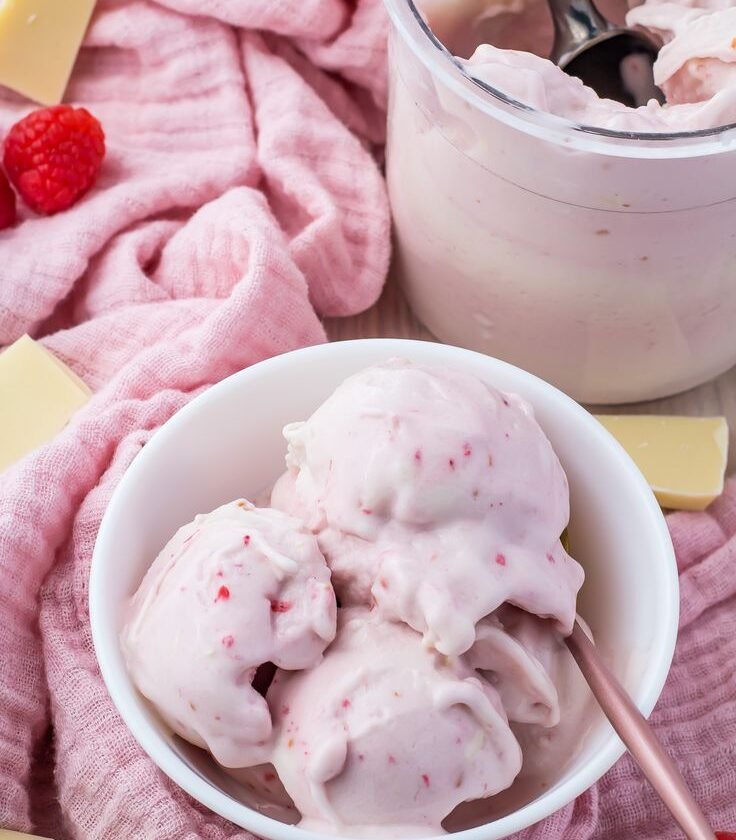
Sweet white chocolate meets bright raspberries in this dreamy ice cream recipe. It feels indulgent, but homemade with your Ninja Creami keeps it fresh and satisfying.
You’ll get creamy richness with a punch of vibrant berry flavor—all easily crafted in your kitchen.
Curious how to balance intense sweetness and natural tartness in one scoop? Let’s build it step by step.
1. Why White Chocolate & Raspberry Are a Dream Duo
Why does this pairing sound fancy? And how do flavors work together?
White chocolate brings buttery sweetness with vanilla notes. Raspberries offer bright acidity and fruity tartness. Together, they create harmony—no single flavor overwhelms.
You experience creamy bliss with a lively berry kick: perfect contrast in texture and taste.
2. Why the Ninja Creami Makes This Recipe Shine
Can’t I just blend and freeze? Not quite.
Ninja Creami spins frozen bases into silky ice cream by shaving frozen blocks. It delivers café-quality texture at home—no churning, fancy equipment, or intimidating steps.
Control your sweetness, raspberry intensity, and swirl texture in one versatile machine.
3. Ingredient Guide: What You Need (and Why)
Here’s what brings this recipe to life:
- Whole milk (1 cup) – foundation for creaminess
- Heavy cream (¾ cup) – creates luxurious texture
- White chocolate chips (½ cup) – melts into a smooth base
- Raspberries (1 cup fresh or thawed frozen) – for fresh berry flavor
- Sugar (⅓ cup) – balances berry tartness
- Sweetened condensed milk (2 Tbsp) – adds richness and stability
- Vanilla extract (1 tsp) – complements white chocolate
- Pinch of salt – enhances sweetness
Optional stir-ins:
- Extra white chocolate chips or chunks
- Raspberry purée swirl
4. Step 1: Make the White Chocolate Mixture
Start gently melting chocolate:
- In a medium saucepan, combine milk, cream, and sugar. Heat until warm, not boiling.
- Add white chocolate chips and whisk until fully melted.
- Remove from heat and stir in sweetened condensed milk, vanilla, and salt.
This creates a rich, velvety base—key for your ice cream’s creaminess.
5. Step 2: Prepare the Raspberry Component
Meanwhile, prepare your raspberries:
- For fresh berries: gently mash half of them to release flavor; leave the rest whole.
- For frozen berries: thaw slightly and mash half, leaving some whole for texture.
This approach ensures you’ll taste berry bursts throughout the ice cream.
6. Step 3: Assemble & Freeze
Once the chocolate base cools slightly:
- Swirl in raspberries gently—not fully mixing to maintain color streaks.
- Pour into Ninja Creami pint container (leaving headspace).
- Freeze flat for 24 hours until solid.
Full freezing is essential—ensures clean texture during spinning.
7. Step 4: Spin the Creami
After freezing:
- Load the pint into the Ninja Creami base and lock the blade.
- Select Ice Cream mode and spin.
- Check texture: if crumbly, add 1–2 Tbsp milk or cream and Re‑Spin.
- Repeat until ice cream is smooth and scoopable.
Texture should be creamy, with visible berry streaks and ribbons of white chocolate.
8. Step 5: Add Optional Mix-Ins
Want extra indulgence? After the first spin:
- Make a small well in the center.
- Add a handful of white chocolate chips or raspberry swirl.
- Use the Mix-In function to fold in evenly.
This step adds texture and visual appeal without overriding the main flavor balance.
9. Flavor and Texture Expectations
What should you taste?
- Creamy base with distinct white chocolate richness
- Bright, fresh bursts of raspberry
- Balance of sweetness and subtle tartness
- Silky, soft texture from the Creami spin
- Occasional mix-in crunch or swirl bite
Each spoon feels indulgent yet fresh.
Video:
10. Customizations & Variations
Want to get creative? Here are tweaks to explore:
| Variation | Change/Add |
|---|---|
| Dairy-free | Use coconut cream + almond milk |
| Dark chocolate version | Use white & dark chocolate chips |
| Intensify berry flavor | Use 1½ cups raspberries or add purée |
| Nutty add-in | Fold in chopped toasted almonds |
| Alcohol twist | Add 1 Tbsp coconut rum or framboise liqueur |
| Lemon brightness | Add teaspoon zest for citrus zing |
Experiment and discover your favorite combination.
11. Storage Tips
To keep it perfect:
- Smooth the surface and seal the pint after use.
- Re-freeze immediately.
- Before serving again, let it sit 5 minutes and Re‑Spin.
Texture remains fresh—no icy, crunchy disappointments.
12. Nutritional Snapshot (Approx. per ½ Pint)
- Calories: ~300–350 kcal
- Fat: ~18–22 g
- Sugar: ~30–35 g
- Protein: ~4–5 g
Healthier tweaks: replace sugar with allulose, use low-fat milk, or lower cream ratio.
13. Frequently Asked Questions
Q: Can I use gel food coloring to mimic swirl?
A: Yes, but natural berry color adds authenticity. You can add a drop to intensify hues.
Q: Does fresh vs. frozen raspberry matter?
A: Frozen works well after thawing. Fresh gives more texture and brightness.
Q: Can I double this recipe?
A: Only if you have two Ninja Creami pints; don’t overfill one container.
Q: Ice cream tastes bland—help?
A: Increase vanilla, add more berries, or stir in white chocolate chunks.
14. Why This Recipe Is Worth Your Time
- Combines gourmet flavors—white chocolate & raspberry—at home
- Utilizes Ninja Creami for exceptional texture
- Customizable for dietary preferences
- Easy yet impressive recipe for family or guests
You spend less time than a store trip and get a dessert that stands out.
Conclusion
Your Ninja Creami White Chocolate Raspberry Ice Cream blends creamy indulgence with vibrant berry brightness in a way that’s hard to resist. It’s luxurious but approachable, ideal for any occasion when you want something special—without store-bought fillers.
Give it a try. Craft your base, spin it up, and dive into icy indulgence that feels both elegant and comforting. Once you taste homemade perfection, there’s no going back.