Intro: Dessert Goals Just Got a Keto Upgrade
Ever crave a decadent dessert that tastes like it belongs in a fancy ice cream shop—but still keeps your keto goals intact? You’re not alone. Most of us on a low-carb lifestyle miss that rich, creamy indulgence that traditional ice cream delivers. Especially when chocolate, coffee, and almonds come together in one dreamy bite.
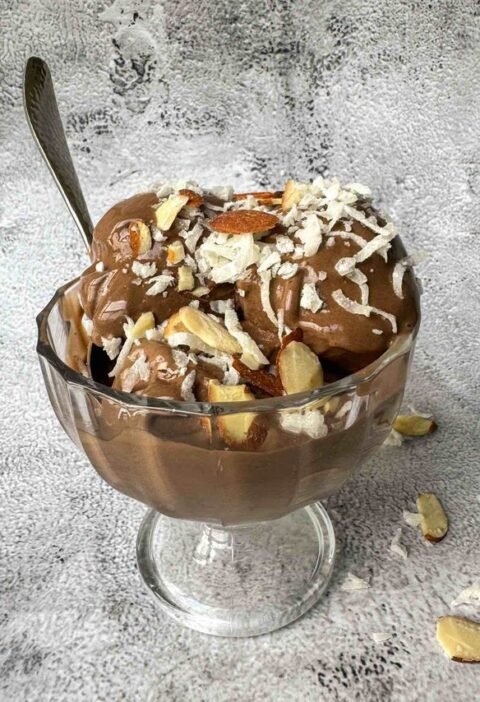
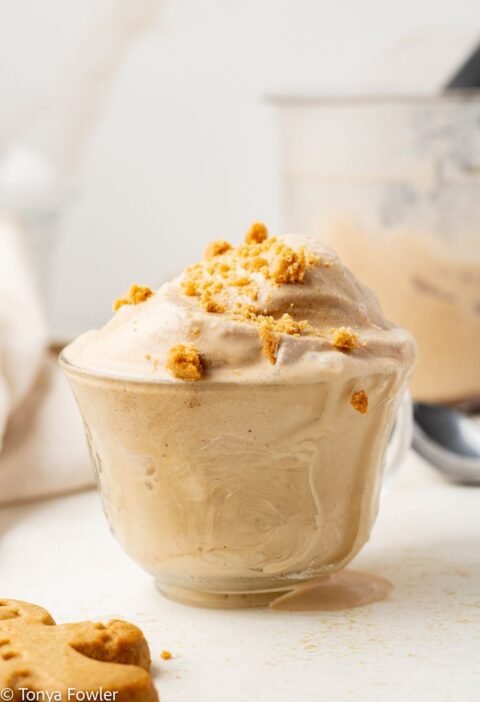
That’s exactly why this Ninja Creami Keto Mocha Almond Fudge Ice Cream exists. It’s smooth, loaded with texture, and layered with bold flavors—from deep mocha to velvety fudge and roasted almond crunch. Best of all, it’s made right in your Ninja Creami, so it’s creamy without any iciness—and low-carb without tasting “diet.”
Let’s dive into how this gourmet treat comes to life in your own kitchen, step-by-step.
1. What’s So Special About Mocha Almond Fudge—Keto Style?
You might be asking, why this combo? Why mocha, almond, and fudge?
Here’s why it works: mocha brings that deep, rich coffee-chocolate flavor, fudge swirls add creamy decadence, and roasted almonds create the perfect crunchy contrast. Now, pair that with a creamy, low-carb base—thanks to the magic of the Ninja Creami—and you’ve got a dessert that feels indulgent but fits into a keto lifestyle.
What makes this version even better:
- Keto-approved (under 5g net carbs per serving)
- Smooth and scoopable with zero sugar
- Customizable for different dietary needs
- Rich flavors that satisfy coffee and chocolate lovers alike
The goal here isn’t just to “make it work” for keto. It’s to make it unforgettable.
2. Ingredients: What You Need for This Creamy, Crunchy Dream
Let’s gather what you’ll need before you start. Nothing fancy—just clean, keto-friendly ingredients that deliver flavor without sugar.
Base Ice Cream Ingredients:
- 1 cup heavy whipping cream
- ¾ cup unsweetened almond milk
- 2 tbsp unsweetened cocoa powder
- 2 tbsp instant espresso powder (or strong brewed coffee, cooled)
- 3 tbsp allulose (or monk fruit blend)
- ½ tsp vanilla extract
- Pinch of salt
Fudge Swirl:
- 2 tbsp sugar-free chocolate chips (melted with 1 tsp coconut oil)
- Optional: add 1 tsp unsweetened almond butter to make it richer
Mix-Ins:
- 2 tbsp toasted chopped almonds (unsalted)
- Extra sugar-free chocolate chips or fudge chunks (optional)
This combo brings bold flavor and the right mouthfeel, without any sugar crashes.
3. Let’s Make It: Step-by-Step Instructions for the Creamiest Mocha Almond Fudge
Now comes the fun part. The Ninja Creami makes it easy, but following the steps properly ensures restaurant-quality results at home.
Step 1: Whisk the Base
- In a medium mixing bowl, whisk together the heavy cream, almond milk, cocoa powder, espresso powder, sweetener, vanilla, and salt.
- Whisk until the cocoa and espresso powder are fully dissolved and no lumps remain.
- Taste it. Want it more chocolatey? Add a bit more cocoa. Prefer stronger coffee? Add a pinch more espresso.
Step 2: Freeze It Properly
- Pour the mixture into your Ninja Creami pint container.
- Freeze upright for at least 20–24 hours. It must be rock solid for proper processing.
- Avoid shortcuts here—this part sets the foundation for perfect texture.
Step 3: Time to Creamify
- Remove the pint from the freezer and place it into the Ninja Creami outer bowl.
- Lock it into the machine and press the “Ice Cream” button.
- After the first cycle, check the texture. If it’s crumbly, press “Re-spin” until it’s creamy.
Step 4: Swirl and Mix
- Once the texture is smooth, dig out 2–3 tablespoons of the ice cream into a small bowl.
- Mix in your fudge sauce and toasted almonds.
- Return this mix to the pint and press the “Mix-In” button.
Now? You’ve got a pint of creamy, keto mocha almond fudge ice cream ready to impress.
4. Pro Tips for the Perfect Ninja Creami Keto Ice Cream
Getting your base frozen is just the beginning. Texture and flavor make all the difference.
Here’s how to perfect every pint:
- Use allulose for creaminess. Unlike erythritol, it doesn’t crystallize when frozen.
- Add a pinch of xanthan gum (¼ tsp) if you want a smoother, custard-like finish.
- Always let your frozen base sit at room temp for 5–10 minutes before spinning.
- Use freshly toasted almonds. Their flavor pops way more than store-bought pre-roasted nuts.
This extra care turns your homemade treat into a dessert that rivals anything store-bought.
5. Nutrition Facts: Is This Really Keto-Friendly?
Let’s get down to numbers. Can this ice cream actually fit your daily macros?
Yes—and here’s how it breaks down per ½ cup serving:
| Nutrient | Amount |
|---|---|
| Calories | 215 |
| Total Fat | 21g |
| Net Carbs | 4g |
| Sugar Alcohols | 3g |
| Protein | 3g |
Values based on using allulose and almond milk. Slight variations may occur depending on your brand of chocolate or almond butter.
In short: all the creamy, chocolaty goodness—none of the sugar crash.
Video:
6. Want It Dairy-Free or Vegan? No Problem
Need to make it dairy-free or plant-based? You’re covered. Just swap a few ingredients, and you’re good to go.
Here’s How:
- Replace heavy cream with coconut cream
- Use unsweetened macadamia milk instead of almond milk for a neutral flavor
- Choose vegan, sugar-free chocolate chips like Hu or Lily’s
- Add a spoon of almond butter or cashew butter for creaminess
The flavor and texture stay surprisingly rich—and it keeps your treat inclusive for any dietary need.
7. Storage Tips: What If You Have Leftovers?
Let’s say you somehow don’t finish the whole pint. What now?
Here’s the trick:
- Keep it in the same Ninja Creami container, tightly sealed.
- When ready to eat again, let it sit at room temperature for 10–15 minutes.
- Then, use the “Re-spin” function to bring it back to creamy perfection.
Want to remix it on day two? Add extra almonds or a drizzle of keto chocolate syrup before re-spinning.
8. Ninja Creami vs Other Ice Cream Makers: Why It Wins on Keto
You may wonder—why not use a traditional churner?
Here’s the deal: keto ice cream bases lack sugar and stabilizers, so they often freeze into rock-solid blocks or get icy. The Ninja Creami’s blade system shaves the frozen base into a creamy, soft-serve texture—no stabilizers required.
Why Ninja Creami wins:
- It breaks down frozen bases instead of freezing liquid from scratch
- It gives you scoop-shop texture without any sugar
- It’s perfect for low-carb, sugar-free recipes that traditional churners struggle with
If you’re serious about keto and love ice cream? This machine is worth it.
9. Fun Variations: Get Creative with Flavors and Textures
Already loving the mocha almond fudge combo? Try switching it up with these tasty twists:
Chocolate Hazelnut Mocha
- Swap almonds for roasted hazelnuts
- Add a swirl of sugar-free hazelnut spread
Mocha Coconut Crunch
- Add unsweetened shredded coconut and coconut milk in place of almond milk
Spicy Mocha Kick
- Add a pinch of cayenne pepper and cinnamon for a Mexican hot chocolate vibe
Each version keeps the recipe fresh, fun, and still totally keto.
10. Conclusion: A Dessert That Doesn’t Compromise
Let’s wrap it up. The beauty of this Ninja Creami Keto Mocha Almond Fudge Ice Cream isn’t just that it’s sugar-free. It’s that it doesn’t compromise on anything—flavor, texture, or satisfaction.
You get:
- Bold mocha and rich fudge flavor
- Crunchy almonds in every bite
- Creamy, dreamy texture—just like your favorite scoop shop
- Low-carb ingredients that fit your lifestyle
Whether you’re ending a meal or enjoying a guilt-free late-night treat, this recipe proves that being keto doesn’t mean giving up dessert. It just means redefining it.
So, ready to make your own pint of magic? Fire up the Ninja Creami, and let those cravings melt away into mocha-fudge heaven.