Ever find yourself craving something creamy, sweet, and refreshing—but without the sugar crash or diet guilt that follows?
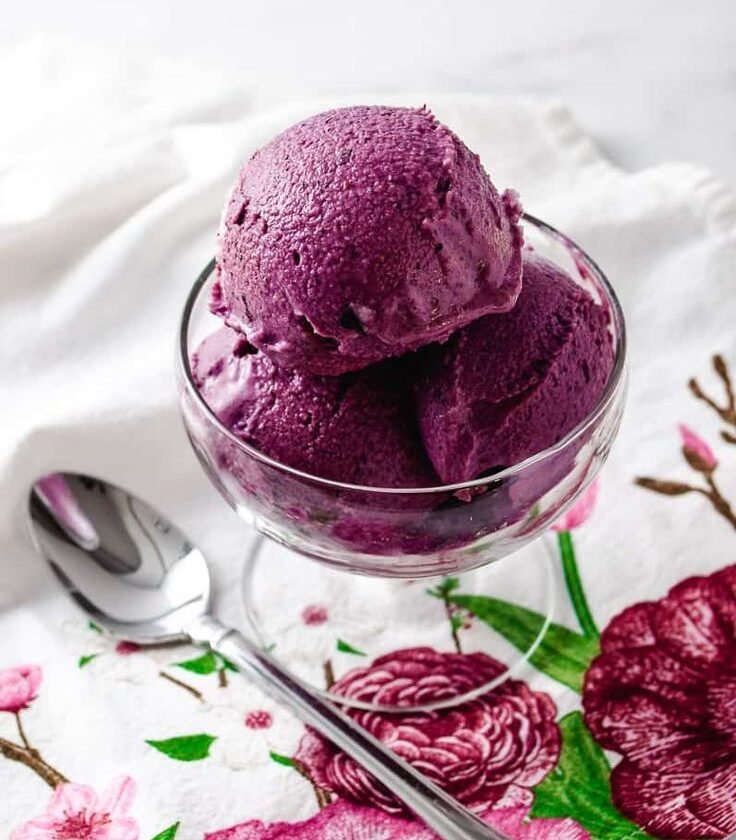
If so, the Ninja Creami Greek Yogurt Berry Swirl might be exactly what you need. It’s a dreamy, protein-packed dessert made right at home with ingredients you already love—tangy Greek yogurt, juicy berries, and a hint of natural sweetness.
But what makes this recipe stand out from other frozen yogurt blends? It’s not just healthy—it’s an actual dessert experience. And yes, you’ll be swirling those beautiful berry ribbons through a creamy yogurt base like a frozen dessert artist in your own kitchen.
Let’s dive into everything you need to know to make this recipe, get those perfect swirls, and tweak it to your taste preferences.
1. What Makes Ninja Creami So Special for Greek Yogurt Recipes?
If you’re unfamiliar with the Ninja Creami, here’s the deal:
This is not your average ice cream maker. It transforms frozen blocks into creamy desserts through its “Creamify” technology, which mixes and spins ingredients into a luscious, silky texture.
But how does that help when you’re working with Greek yogurt?
- It preserves the texture: Greek yogurt is naturally thick. The Ninja Creami turns that density into a smooth, spoonable treat without the need for heavy cream or thickeners.
- No extra churn time: You don’t have to churn manually or babysit the process. Freeze the base, Creamify it, and you’re done.
- You control the ingredients: Whether you’re dairy-free, low-sugar, or just picky about ingredients—this tool lets you craft your perfect dessert bowl.
So yes, Ninja Creami is more than a trendy gadget—it’s your gateway to gourmet-style frozen yogurt at home.
2. What Ingredients Do You Need for Greek Yogurt Berry Swirl?
Let’s break down the core ingredients before we get to the method.
Main Base Ingredients:
- 1 cup full-fat plain Greek yogurt (for creaminess)
- ½ cup unsweetened almond milk or regular milk (for smooth blending)
- 2 tablespoons honey or maple syrup (for sweetness)
- ½ teaspoon vanilla extract (for flavor depth)
Berry Swirl Mixture:
- ½ cup mixed berries (fresh or frozen – blueberries, raspberries, strawberries)
- 1 teaspoon lemon juice
- 1 tablespoon honey or sweetener of choice
What’s great? You can tweak the berries and sweetener based on what you have at home. No rules—just your taste buds.
3. How to Make the Greek Yogurt Base (Step-by-Step)
The base is where the magic begins. The smoother and creamier your mix, the better your final result will be.
Step-by-Step:
- Mix the base: In a mixing bowl, whisk together Greek yogurt, milk, honey, and vanilla until fully combined.
- Transfer to pint container: Pour the mixture into your Ninja Creami pint container. Make sure it doesn’t go over the “Max Fill” line.
- Freeze flat: Freeze the pint container flat for at least 24 hours. This ensures even blending later.
Tip: For extra smooth results, strain the yogurt through a fine mesh before mixing (optional but pro-level!).
4. Preparing the Berry Swirl Sauce (No Cooking Required!)
Here’s where the flavor lift comes in—the swirl. It adds color, tang, and sweetness all in one step.
Quick Instructions:
- Blend the berries: Toss your berries into a blender or food processor.
- Add honey and lemon: Pulse with sweetener and lemon juice until smooth.
- Optional: Strain the berry sauce if you want to remove seeds.
This berry mixture can be stored in the fridge until you’re ready to swirl. It’s also amazing over pancakes, waffles, or overnight oats.
5. The Creamify Process: How to Use Your Ninja Creami
Once your base is fully frozen and the berry swirl is ready, it’s time to bring it all together.
Here’s what to do:
- Remove frozen base: Take the pint out of the freezer and place it into the Ninja Creami bowl.
- Creamify: Lock it into the Ninja Creami machine and use the “Lite Ice Cream” or “Smoothie Bowl” setting.
- Check the texture: If it looks crumbly after the first spin (it usually does), add a splash of milk and re-spin.
Once the texture is smooth and creamy, it’s time to add the swirl.
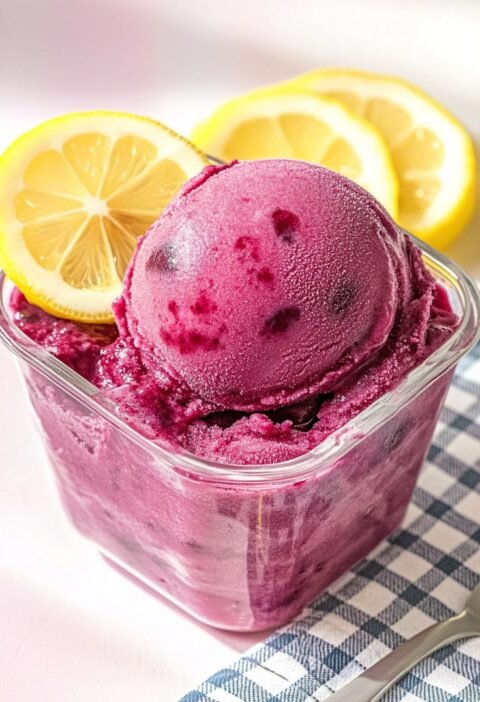
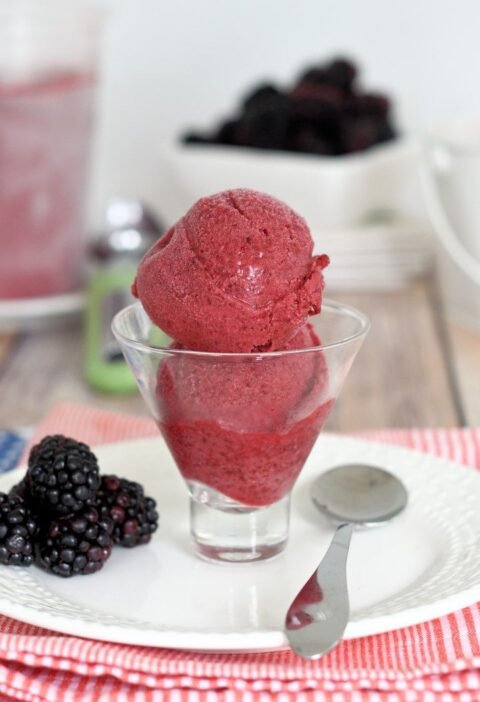
6. Swirl It Like a Pro: How to Create the Berry Ribbon
Now for the fun part—swirling in your berry sauce.
But how do you make sure it looks (and tastes) perfect?
Here’s the trick:
- Make a hole in the center of your frozen yogurt using a spoon.
- Pour the berry sauce into the hole (about 2-3 tablespoons).
- Select the “Mix-in” mode on your Ninja Creami and spin.
The result? A creamy white base with striking ribbons of purple and red, perfectly distributed without muddying the colors.
7. Optional Add-ins and Variations to Try
Want to change it up next time? This recipe is incredibly flexible.
Here are a few ways to switch up the flavor while sticking to the same creamy texture:
Flavor Twists:
- Tropical: Add mango or pineapple puree instead of berries.
- Chocolate-Cherry: Add cocoa powder to the base and swirl in a cherry compote.
- Peanut Butter Banana: Add mashed banana to the base and swirl with peanut butter drizzle.
Add-ins (after Creamify, during Mix-in):
- Crushed granola
- Dark chocolate chips
- Toasted coconut flakes
- Chia seeds for crunch
You can also create layered pints: one part base, one part swirl, then repeat.
Video:
8. Nutritional Breakdown (Per Serving Estimate)
Want to know how healthy this dessert really is? Here’s an approximate breakdown for one serving (makes 2 servings):
| Nutrient | Amount |
|---|---|
| Calories | 160–180 |
| Protein | 12–14g |
| Sugar | 10–12g (depends on sweetener) |
| Fat | 4–5g |
| Carbs | 18–20g |
This is a far cry from traditional ice cream, which can hit 300–400 calories per serving with little protein and tons of added sugar.
9. Why This Recipe Works (The Science Behind It)
Ever wondered why some homemade frozen yogurts turn icy or grainy?
Here’s what this recipe avoids—and why it works so well in the Ninja Creami:
- Greek yogurt’s density gives a creamy texture naturally.
- Fat content from full-fat yogurt prevents iciness.
- Freezing flat helps the machine blend more evenly.
- Re-spinning lets you fine-tune texture without overmixing.
And because the swirl is added after the main blend, you don’t risk diluting the base or over-mixing your flavors.
10. Storing Leftovers (and How to Re-spin for Later)
Made a full pint but can’t finish it in one go?
No worries. Here’s how to store it right:
- Smooth out the surface of leftovers and level it flat.
- Refreeze the pint with the lid on.
- Next time you want a treat, just pop it back into the machine and select “Re-spin.”
You’ll get the same fresh-from-the-freezer texture every time.
Just don’t re-freeze it more than twice—the texture starts to lose its charm.
11. Frequently Asked Questions (You Probably Thought These Too)
Can I use low-fat or non-fat yogurt?
Yes, but it won’t be as creamy. Add a little avocado or banana to help with texture if you go low-fat.
Can I make this dairy-free?
Absolutely. Use a coconut or almond milk yogurt alternative and stick with plant-based milk.
Do I have to wait 24 hours for freezing?
Yes. Less than that and the machine won’t blend it properly. It needs that full freeze to creamify correctly.
Is it okay to use store-bought berry jam?
You can, but it’s sweeter and thicker than the homemade swirl—use a light hand or mix with lemon juice to cut the sugar.
12. Final Thoughts: Is Ninja Creami Greek Yogurt Berry Swirl Worth Making?
Let’s be real—this isn’t just a dessert; it’s a wellness hack dressed as a treat.
You’re getting creamy texture, fresh fruit flavor, and clean ingredients all blended into one gorgeous pint. It’s easy to prep, even easier to customize, and way more exciting than any tub from the store.
So is it worth it? Without a doubt.
If you’re tired of artificial sweeteners, chalky textures, or bland yogurt cups, this Ninja Creami Greek Yogurt Berry Swirl is your delicious answer. And once you make it once—you’ll probably never go back.