Want Decadence Without the Guilt?
You deserve dessert that hits every craving: deep chocolate, creamy peanut butter, and that perfect scoopable texture. And the Ninja Creami makes it happen.
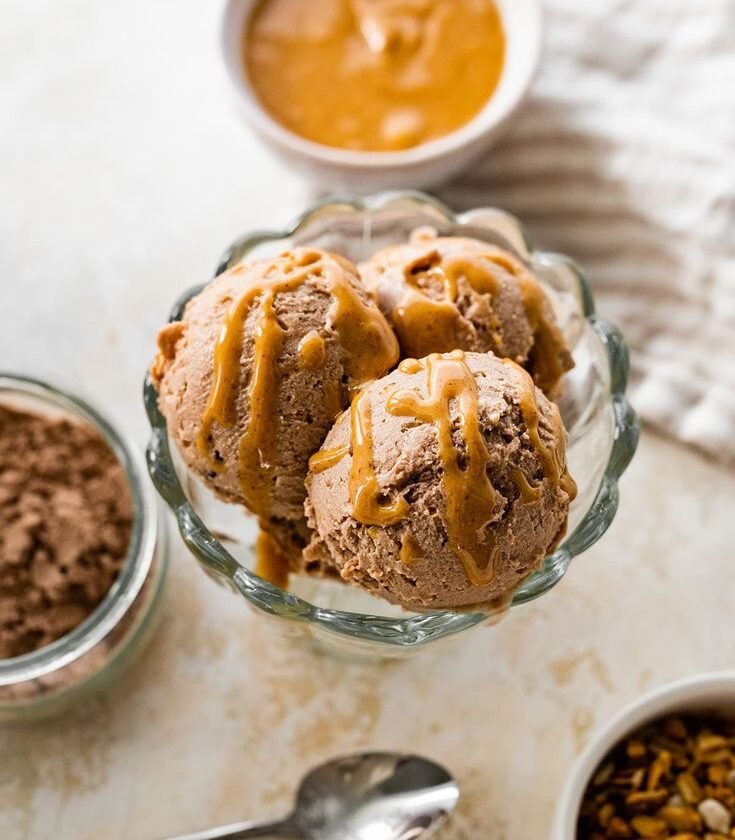
This recipe marries rich cocoa and luscious peanut butter into a keto-friendly ice cream that tastes and feels indulgent—without sugar crashes or hidden carbs. It’s full of healthy fats, bold flavor, and spin-to-scoop convenience.
You’ll be amazed how easily a few quality ingredients and your Creami unlock that creamy dessert experience. Ready for spoons to drop? Let’s go!
1. Why Chocolate and Peanut Butter is a Power Pair
What makes this combo so classic?
- Flavor contrast: deep cocoa meets nutty warmth in each bite.
- Natural sweetness from peanut softens the chocolate intensity.
- Healthy fats from peanut butter keep you full and focused.
- Finally, the Ninja Creami delivers scoopable, creamy texture without sugar or unnecessary fillers.
It’s dessert reimagined—intense, satisfying, and smart.
2. Ingredients You’ll Need—a Clean, Quality List
Here’s your shopping list. No artificial flavors, no sugar bombs—just good stuff.
Chocolate Peanut Butter Base
| Ingredient | Quantity | Role |
|---|---|---|
| Unsweetened almond milk | 1 cup | Base liquid |
| Heavy cream | ½ cup | Richness and creaminess |
| Allulose or monk fruit sweetener | ¼ cup | Sweetness without sugar |
| Unsweetened cocoa powder | 3 tbsp | Chocolate richness |
| Natural peanut butter (no sugar) | ¼ cup | Peanut flavor and fat content |
| Vanilla extract | 1 tsp | Depth of flavor |
| Pinch of sea salt | — | Heightens taste and balances sweetness |
Optional Add-ins:
- 1 tbsp collagen or whey protein – extra creaminess
- 2 tbsp dark chocolate chips (sugar-free) – for bites
- 1 tsp cinnamon or espresso powder – intensify flavor
3. Tools – No Specialized Gear, Just Your Creami
All you need is your Ninja Creami plus kitchen essentials:
- Creami with blade and pint container
- Whisk or blender for mixing
- Measuring spoons and cups
- Freezer space for a 24‑hour freeze
That’s it—no fancy equipment needed.
4. Step 1: Make Your Chocolate Peanut Butter Base
Mixing this right matters. Here’s how:
- In a bowl, whisk together almond milk, cream, sweetener, and cocoa until fully dissolved.
- Blend in peanut butter, vanilla, salt, and any optional add-ins until smooth.
- Taste it—adjust for more chocolate, peanut, or sweetness until it wows.
Remember, flavor mutes after freezing. Aim for slightly stronger taste now.
5. Step 2: Freeze the Pint Properly
When filling:
- Pour mixture into the Creami pint container, staying below the MAX line.
- Tap gently to remove air bubbles.
- Seal the lid and freeze flat for at least 24 hours.
A full freeze ensures a creamy spin result.
6. Step 3: Spin the Base into Creamy Ice Cream
Time to watch the Creami do its thing:
- Load the frozen pint, secure the blade lid.
- Select the “Ice Cream” function and press start.
- After the cycle, check texture. Add 1–2 tbsp almond milk or cream if it looks crumbly.
- Press “Re-spin” for smooth, scoopable results.
That’s when you’ll see the magic—velvety chocolate ice cream transformed in minutes.
7. Step 4: Add Peanut Butter Swirl and Mix-ins
Want more peanut butter pulls or crunch?
- Create a dimple in the spun ice cream.
- Add 1–2 tbsp natural peanut butter (warmed slightly for swirl).
- Toss in chocolate chips or add-in of choice.
- Use “Mix-In” mode to distribute without overworking.
Now every spoon gives silky chocolate with pockets of peanut butter delight.
8. Nutrition Snapshot – Indulgence Meets Macros
Let’s break it down per 16-oz pint (~2 servings):
| Nutrient | Amount |
|---|---|
| Calories | 500–550 kcal |
| Net Carbs | 6–8g |
| Fat | 50g |
| Protein | 8–10g |
| Sugar | 0g added |
High-fat, low-carb, with just rich, real-flavor satisfaction.
9. Variations to Customize Your Pint
Get creative with these keto-friendly twists:
- Mocha Peanut Butter: add 1 tsp espresso powder
- Mint Choc-PB: add ½ tsp mint extract + sugar-free chocolate chips
- Coconut PB Cup: swirl in coconut flakes + top with PB
- Brownie Bits: fold in keto brownie crumbles
Each option keeps things lively and delicious.
Video:
10. Troubleshooting Table – Instant Fixes
| Problem | Solution |
|---|---|
| Crumbly texture | Add liquid & re-spin |
| Weak flavor | Increase cocoa or peanut butter pre-freezing |
| Ice crystals | Ensure mixture is well-blended and sweetener fully dissolved |
| Too sweet | Reduce sweetener gradually before freezing |
Small adjustments = big payoff.
11. Storing & Refreezing Tips
Love to save it for later? Here’s how to keep it fresh:
- Smooth the top before sealing and re-freezing flat.
- Before serving, let it sit 5–10 minutes, add 1 tbsp cream/almond milk, and re-spin for that fresh-day texture.
- It stays scoopable and enjoyable for up to 2 weeks.
Re-spinning ensures it’s always just-right.
12. Comparison: DIY vs. Store-Bought Keto Ice Cream
Why this homemade version wins:
- No mystery ingredients—only what you choose.
- Better taste customization—control chocolate ratio or peanut intensity.
- Cost-effective—cream and peanut butter are cheaper per serving than branded keto ice cream.
- Fast and flavorful—ready in 24 hours with next-day satisfaction.
A treat that’s fun to make and better to enjoy.
13. Why Peanut Butter and Keto Just Work
Peanuts are more than flavor—they deliver:
- Healthy monounsaturated fats
- Satiating nuts that pair well with low-carb macros
- Natural taste amplifiers for sweet and savory flavor combos
It’s that perfect keto treat component.
14. Final Verdict – Should You Make It?
Yes, absolutely.
You get:
- Decadent chocolate and peanut butter flavor
- Creamy texture that rivals any commercial brand
- Ketogenic macros that fit your goals
- Endless customization and creativity
If you’re craving indulgence with conscience, this recipe delivers every time.
Your Next Step: Make It at Home Tonight
Gather your ingredients—peanut butter, cocoa, Creami, and freezer access. Blend. Freeze. Spin. Swirl. And enjoy every creamy, fudge-through-peanut-butter-swirled spoonful. You deserve this treat.
Let me know how yours turned out or if you want the recipe repurposed into a colorful infographic!