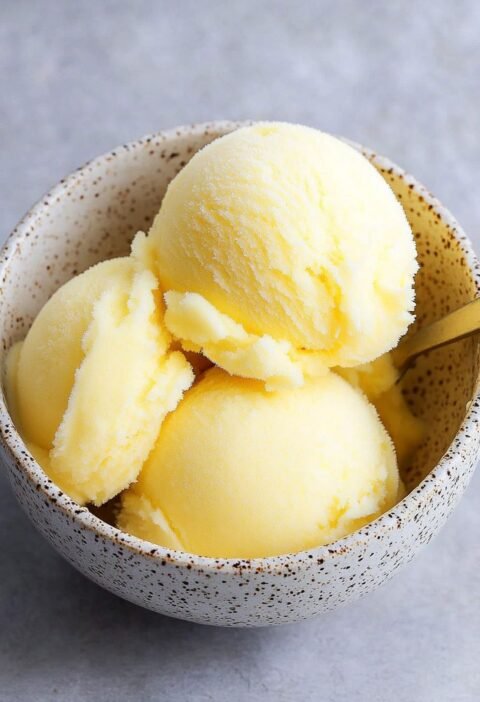
Craving something cold, creamy, and a little nutty? This homemade banana walnut ice cream made with the Ninja Creami is going to steal the show. It’s not just another frozen treat—it’s dessert with depth. Think naturally sweet bananas, buttery walnuts, and a hint of warm vanilla blended into an ultra-smooth scoop. No heavy stabilizers, no strange ingredients. Just real, honest flavor.
What’s even better? You don’t need to churn anything for hours. The Ninja Creami handles it all—you blend, freeze, and spin. The texture is luxurious, and the flavors are wholesome and satisfying. Whether you’re looking for a dairy-free indulgence, a healthy-ish dessert, or a nostalgic bite of banana bread in frozen form, this recipe checks every box.
Let’s dive right in and learn how to whip up this simple but impressive dessert that’ll win over kids, dinner guests, and midnight snackers alike.
1. Why Make Banana Walnut Ice Cream in the Ninja Creami?
Good question. Couldn’t you just buy banana walnut ice cream from the store? Technically, yes—but it wouldn’t be the same.
Here’s why using the Ninja Creami is a game changer:
- Custom flavor control: You decide how sweet, how creamy, how nutty.
- Cleaner ingredients: No gums, preservatives, or artificial colors.
- Better texture: It turns a frozen block into soft, scoopable perfection.
- Perfect for overripe bananas: Don’t toss those brown speckled beauties.
And let’s be honest—there’s something incredibly satisfying about creating a frozen dessert from scratch that tastes better than store-bought.
2. Ingredients You’ll Need
Before we start blending, let’s gather everything. The best part? You probably already have most of this in your kitchen.
Base Ingredients:
- 2 ripe bananas (the riper, the better)
- 1/2 cup whole milk or almond milk (your call)
- 1/4 cup heavy cream or coconut cream
- 1 tbsp maple syrup or honey (adjust to taste)
- 1 tsp vanilla extract
- 1/8 tsp salt (balances the sweetness)
Add-Ins (for mix-in stage):
- 1/3 cup chopped toasted walnuts (you can roast them lightly on the stove or in the oven)
- Optional: dash of cinnamon or nutmeg for a cozy twist
Want it dairy-free? Swap the milk and cream for almond milk and coconut cream—it works beautifully.
3. Prepping the Ice Cream Base
You don’t need fancy techniques or tools for this step—just a blender and your Ninja Creami pint container.
Step-by-Step Base Prep:
- Peel and slice your ripe bananas and toss them in a blender.
- Add milk, cream, sweetener, vanilla, and salt.
- Blend until completely smooth. Taste and tweak. Want it sweeter? Add a bit more syrup.
- Pour the mixture into your Ninja Creami pint container.
- Seal it, and place it flat in the freezer for 24 hours. It must be completely solid before spinning.
This base is the secret to a creamy texture and rich flavor. The bananas give body, sweetness, and a silky mouthfeel naturally.
4. Time to Spin: Creamify That Base
Now comes the fun part—transforming that frozen block into creamy indulgence with the Ninja Creami.
How to Spin Like a Pro:
- Remove the frozen pint from the freezer.
- Insert it into the Ninja Creami outer bowl and secure the lid.
- Choose the “Ice Cream” setting and let it spin.
- After the cycle ends, check the texture.
Too crumbly or powdery? Don’t worry. That’s normal sometimes.
- Just add 1–2 tablespoons of milk or cream.
- Run the “Re-spin” function once more.
- You’ll end up with a smooth, dreamy scoop.
5. Walnut Time: Add Crunch and Flavor
Now let’s add that buttery crunch. Walnuts bring texture, richness, and a nice earthy bite that balances the sweet banana.
How to Mix In Walnuts:
- Remove the lid and create a small well in the center of your ice cream.
- Add in your chopped toasted walnuts (or fold them in with a spoon).
- Secure the lid again and press “Mix-in”.
- Let the Creami do its thing—this function gently incorporates without pulverizing.
Now you’ve got banana walnut ice cream with real nutty chunks in every bite.
6. Serving Suggestions
You can absolutely eat it straight from the pint. But if you want to elevate the experience, here are a few ideas:
- Top with a drizzle of honey and a sprinkle of chopped walnuts.
- Add sliced banana and a dollop of whipped cream for a sundae-style treat.
- Serve on top of warm banana bread for dessert fusion bliss.
- Dust with cinnamon or add a spoonful of peanut butter if you want to go wild.
This ice cream isn’t just a scoop—it’s a dessert base that opens up endless combinations.
7. Nutritional Breakdown (Per Serving)
Here’s an approximate nutritional snapshot based on using whole milk and cream:
| Nutrient | Amount per Serving |
|---|---|
| Calories | 190–220 |
| Carbohydrates | 20–25g |
| Sugars (natural + added) | 13–16g |
| Fat | 12–15g |
| Protein | 3–4g |
| Fiber | 2–3g |
For a lighter version, use plant-based milk and cut the syrup. Bananas provide plenty of natural sweetness on their own.
8. Recipe Tips for Best Results
Want to level up your batch? These insider tips will help:
- Use overripe bananas: Brown spots = better flavor and sweetness.
- Toast your walnuts: This brings out a deeper, buttery flavor and reduces bitterness.
- Chill the mix before freezing: Optional but improves the freezing consistency.
- Avoid over-mixing: Stir-ins like walnuts should retain their texture, not turn to paste.
- Use airtight containers: If saving leftovers, this prevents ice crystals from forming.
Little tweaks make a big difference when it comes to homemade ice cream.
9. Fun Variations to Try Next
Once you master this combo, you can start experimenting. Here are a few flavor spinoffs that work brilliantly with this base:
- Banana Chocolate Walnut: Toss in mini chocolate chips with the walnuts.
- Salted Caramel Banana Nut: Add a swirl of salted caramel post-spin.
- Spiced Banana Walnut: Mix in cinnamon, nutmeg, and clove for a warm, cozy twist.
- Banana Coconut Crunch: Use coconut cream and top with toasted coconut flakes.
- Banana Mocha Swirl: Blend in a touch of espresso powder and chocolate sauce.
Every variation brings something new to the table—and you don’t need a new recipe for each.
10. Storage Tips for Leftovers
You might not have any leftovers—but if you do, here’s how to keep them tasting fresh:
- Store in the original Ninja Creami pint container or another airtight freezer-safe bowl.
- Press plastic wrap directly onto the surface to minimize freezer burn.
- When ready to eat again, run a re-spin cycle to restore creaminess.
The texture may firm up over time, but a quick spin brings it right back to its original state.
11. FAQs – You Asked, We Answered
Q: Can I use frozen bananas instead of fresh?
Only if you thaw them first. You want a smooth blend before freezing.
Q: What’s the best dairy-free combo?
Almond milk and coconut cream are a great pair. They create creaminess without overpowering the banana.
Q: Can I reduce the sugar?
Absolutely. Use just ripe bananas and skip the syrup for a naturally sweet option.
Q: What if I don’t have walnuts?
Try pecans or almonds—or leave the nuts out entirely. It’ll still be creamy and delicious.
Q: Is this ice cream healthy?
It can be. With whole ingredients, no preservatives, and minimal sweetener, it’s definitely a cleaner option than many store brands.
12. Conclusion: A New Favorite Ice Cream, Made Simple
Banana walnut ice cream doesn’t have to be complicated. In fact, with the Ninja Creami, it’s one of the easiest and most satisfying frozen desserts you’ll ever make.
From the naturally sweet base to the crunchy toasted walnuts, this recipe is about real ingredients and bold flavor. It’s nostalgic but fresh, indulgent yet nourishing. Plus, it gives you full control—customizable sweetness, texture, mix-ins, and dietary tweaks.